Category: Developer Relations

Payabli Integration Skills: Build Faster With AI Agents

By Casey Smith, Payabli Docs

Key takeaways

  • Payabli Integration Skills are open-source agent skills that point your AI coding agent at the live Payabli docs, so it ships a working integration from one prompt: payments in and out, invoices, payment links, webhooks, disputes, and reporting. A thirty-minute session, full integration, no manual fixes, validated against a live sandbox.
  • Without that grounding, agents guess. They invent endpoints and skip steps that have to happen in order, so the code compiles and then breaks. Skills hand the agent the real endpoints and the right sequence up front.
  • Skills run in any agent that supports the open Agent Skills standard: Claude Code, Cursor, Codex, GitHub Copilot, and Gemini CLI. They cover the whole surface, from payments to webhooks to certification.
  • The order of operations and gotchas are written into each skill by hand, while facts like endpoints link out to the live docs, so the skills stay current as the API changes, with no skill to re-ship. 

During a thirty-minute session, I built an integration with Payabli that wired up CRUD operations for vendors and customers, payment acceptance, payout functionality, invoices, payment links, chargeback response handling, and reporting dashboards, all of it from a single prompt, with no manual fixes, validated against a live sandbox. I’m not bragging. I did it all with Claude Code and Payabli’s new Integration Agent Skills, a set of open-source agent skills, grounded in the Payabli docs, that give your coding agent the procedural knowledge and ground truth it needs to build a sound Payabli integration from the first prompt.
Why ungrounded AI agents write code that fails

If youโ€™ve spent any time building with an AI coding assistant, youโ€™ve probably seen this: the agent produces code that looks completely right. It uses endpoint patterns that are extrapolated from an API surface, parameter names that follow reasonable conventions, and webhook event types that feel like they should exist. And then none of it works.

This isn’t a failure of the model or the agent, it’s a grounding problem. Grounding is the practice of connecting an AI agent to accurate, current information so it works from facts rather than inference. A coding agent that hasn’t been given accurate, up-to-date information about a specific API will fill in the gaps with plausible-looking guesses (even if you tell it not to make mistakes). Ask it to fetch a user’s orders, and it’ll guess GET/users/{id}/orders clean, RESTful, exactly the route youโ€™d guess yourself. But the real API might nest that resource differently, or expose it somewhere else entirely. The guess is reasonable, conventional, and wrong. But thereโ€™s no way to know that from the outside; you have to read the docs.

Hallucinated endpoints are one visible version of bad grounding. Less obvious problems with bad grounding are procedural gotchas: things like steps that have to happen in a specific order or status transitions that aren’t obvious from the API shape alone. For example, a bill that’s been sent for approval sits in a pending state that blocks payout until itโ€™s resolved, so an agent that tries to pay it right away gets a failure that it couldn’t predict and then has to debug. The agent would only know to avoid this if it read the docs.

This is the gap that skills help you close.

How Payabli Integration Skills work

A skill is a structured instruction document that your coding agent loads into context when it’s relevant. It tells your agent how to approach a specific kind of task, not just what the API looks like, but what to do first, what decisions to make along the way, and what patterns to follow. Think of it as giving your agent a knowledgeable colleague who has already read the docs, knows the gotchas, and will speak up before you make a mistake.
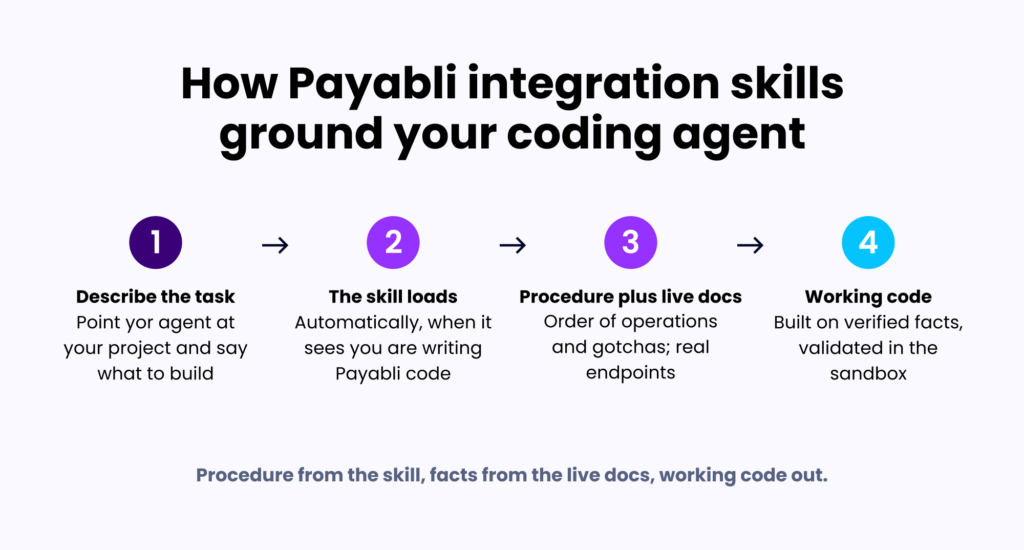
We authored our skills using the Agent Skills standards, which define how skills are structured and discovered. You don’t have to invoke the skills by name, your agent loads them on its own when it recognizes you’re writing Payabli code. Just describe what you’re building.

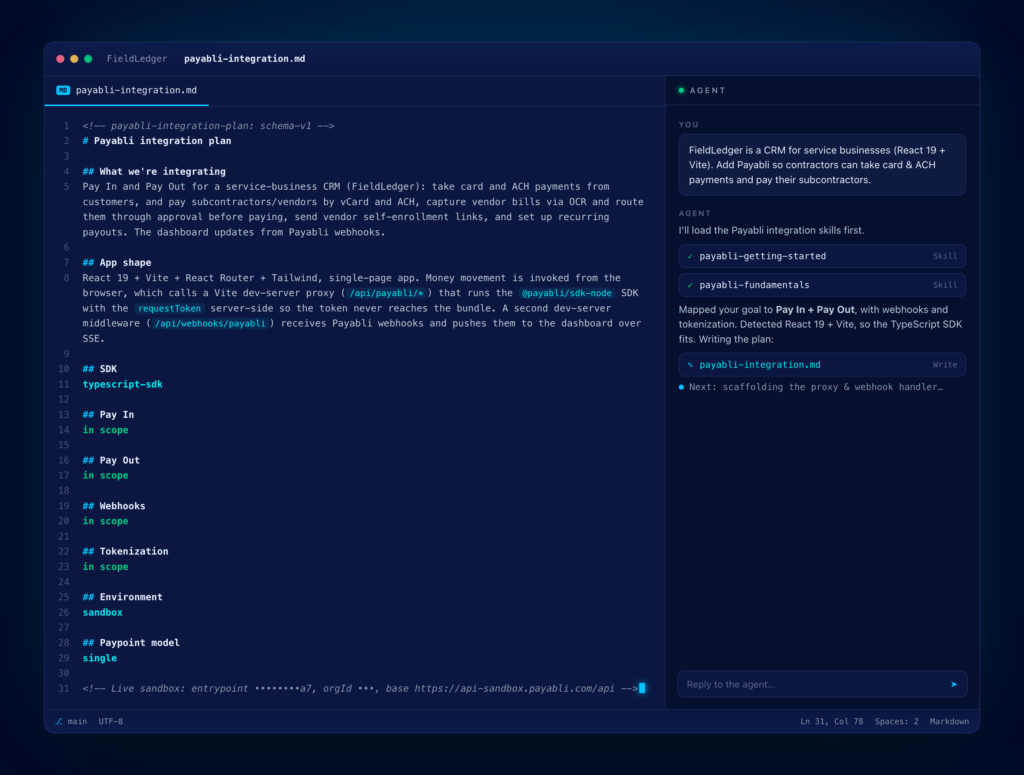
Most integrations start with payabli-getting-started, which interviews you rather than dumping a wall of context at your agent. Point your agent at your project and say something like: “I want to add Payabli payments to this app, look at my stack and tell me which Payabli pieces I need and how to wire them up.” The skill walks your agent through a structured conversation about your goals, your app architecture, and which Payabli features you need. Out of that conversation comes a payabli-integration.md artifact, a plain-markdown file that lives in your repo and records the plan. As you work, your agent updates it. From that point on, the right skills load automatically as you build. Your agent has the auth patterns, the order of operations, and the gotchas it needs for whatever you’re working on next, and pulls exact endpoint paths and field names from the live docs, so the code it writes is based on verified information.

That artifact is what makes multi-session work tractable. Come back the next day in a fresh session, and your agent can read the file, pick up where you left off, and know what you’ve already built and what’s coming next. The other Payabli skills read from it, so decisions you made early in the integration follow through consistently.

Skills cover the full integration surface: payments in, payments out, subscriptions, webhooks, disputes, reporting, and certification prep. They work in any agent that supports the standard, including Claude Code, Cursor, Codex, GitHub Copilot, Gemini CLI, and more. How we built Payabli Integration Skills

Keeping skills accurate at scale requires an intentional architecture. Our approach was shaped by two ideas.

Skills stay lean by design 

Every skill was written against the Agent Skills spec and validated with the skill-validator tool. The whole set passed, and every skill sits comfortably within the size limits the spec recommends as a best practice. This matters because context is finite: every token a bloated skill takes up is a token your agent can’t spend on your actual code.

Procedural knowledge is human-curated, factual content links out

Each skill contains two kinds of content. The procedural knowledge, like the order of operations, the decisions that matter, and the gotchas, is written in the skill and stays in the skill. The factual content, like endpoint paths, field names, and response shapes, doesn’t get copied into the skill, and instead links out to the live docs at docs.payabli.com.

That distinction is what helps keep our skills current. When we ship a release, we update the docs. A skill that links to a docs page is reading from the current version the next time your agent fetches it, so there’s no skill update required. The procedural content is the part that changes less frequently and benefits most from close human review when it does change.

That human involvement is intentional. The procedural knowledge in each skill, the sequencing, the gotchas, and the decision guidelines, is written and maintained by the Payabli Docs team, not auto-generated and shipped. Every skill has been tested against real sandbox integrations to verify that it guides agents into correct, working code that follows best practices. We’re building tools to help you integrate faster with AI, but we’re not outsourcing the judgment about what good integration advice looks like. That part stays with people.

Skills give your agent an accurate foundation: the right patterns, the right sequence, the real endpoints. Think of them as guardrails, not autopilot. They don’t control what your agent does with that foundation, so the output is still worth your review before it goes anywhere near production.

Integration Skills and the Docs MCP: Use both

Skills and the Payabli Docs MCP server are complementary. Here is how they divide work:
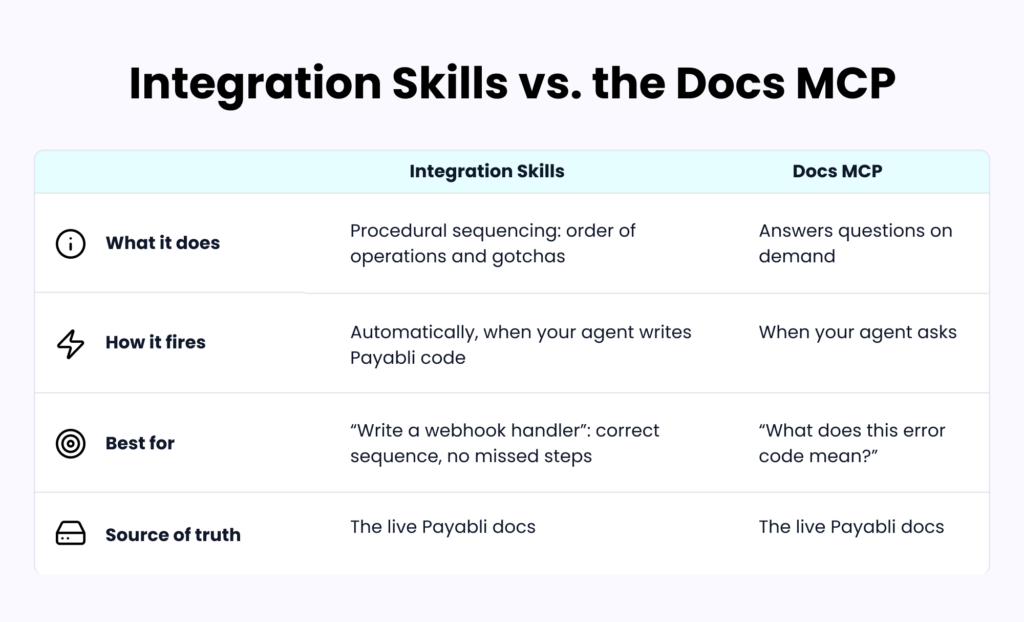
The MCP answers questions: โ€œWhat does this error code mean?โ€ or โ€œHow does paypoint scoping work?โ€ Itโ€™s conversational: your agent asks, the MCP reads the docs, and responds.

Skills handle procedural sequencing: when your agent is about to write a webhook handler, the relevant skill fires and gives it the order of operations and the gotchas to watch for, without you having to tell it what to do.

Both read from the same source of truth, so they converge on the same answers. The skill set even includes payabli-mcp-setup which configures the Docs MCP for you, so it’s easy to install both.

Who Payabli Integration Skills are for

Payabli Integration Skills are useful for two kinds of builders.

If you’re building with a coding agent and limited fintech experience, skills are the difference between an agent that ships and an agent that confidently produces code that doesn’t work. Skills give your agent the right Payabli knowledge to integrate safely. In my run, it didn’t need course-correcting, which matters most when you don’t know the platform well enough to course-correct it yourself.

If youโ€™re an experienced developer using AI tooling to move faster, skills save you from looking up details every time you touch a new part of the Payabli surface. The void vs. refund decision, the bill status transitions, the CIT/MIT distinction, theyโ€™re there when you need them, and out of the way when you donโ€™t.

Get started with Payabli Integration Skills

Install the skills and start building. The README walks through the install options for each supported agent, so you can pick the one that fits how you work. Point your agent at your project, describe what you want to build, and let the skills handle the grounding. 

payabli/integration-skills on GitHub โ†’


Learn about our developer toolsand agent resourcesin the Payabli Docs.
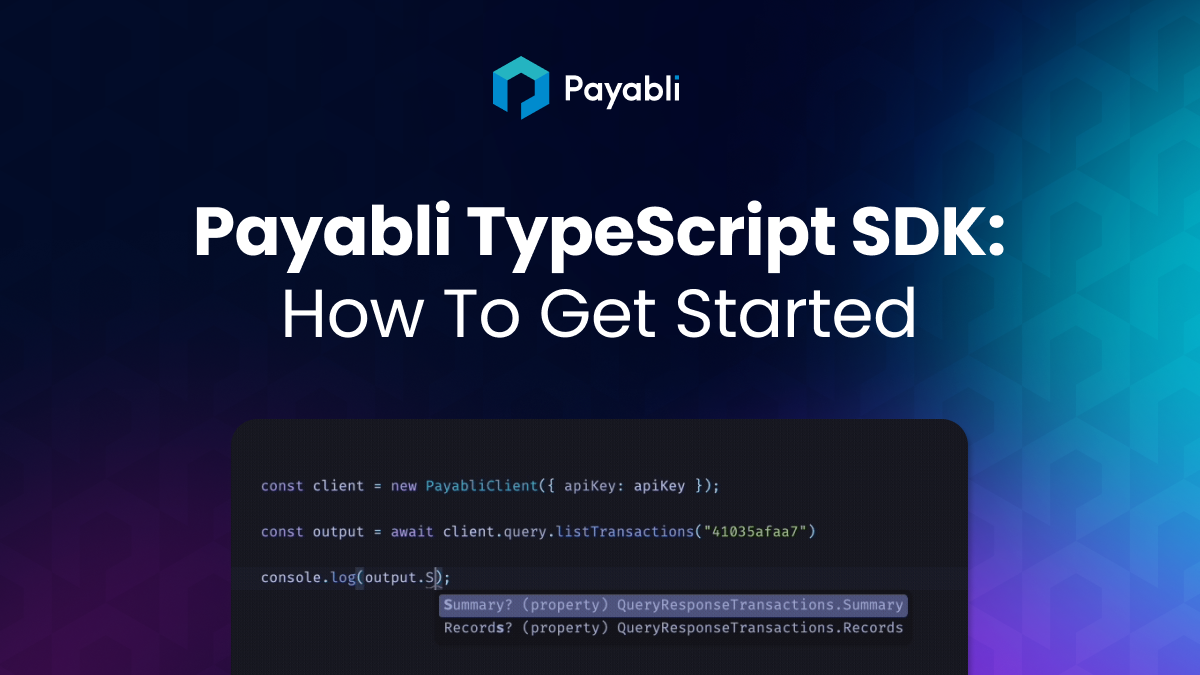
Payabli TypeScript SDK: How to get started

By Elijah Skeirik, Payabli Docs

If you’re building a payments integration with TypeScript, you’ve probably hit the point where raw API calls start getting messy: hand-rolling request bodies, deciphering error responses, and having no type hints to tell you whether a field is required or what shape the response will be. The Payabli TypeScript SDK is the fix for that.

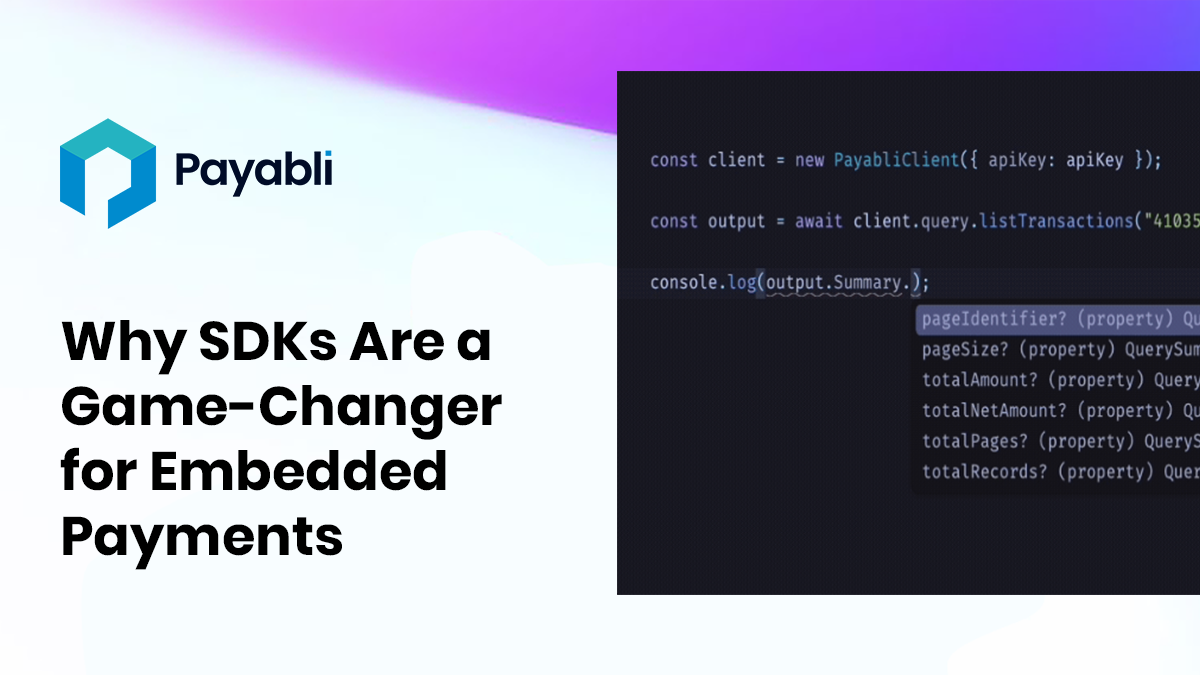
@payabli/sdk-node gives you type-safe access to the full Payabli API. That means autocomplete in your editor, TypeScript interfaces for every request and response, built-in retries, and structured error handling you don’t have to wire up yourself. You write less boilerplate and catch more mistakes before they hit production.

This post walks through two things: making your first payment transaction and setting up webhooks to receive real-time payment notifications. Both are covered in depth in the Payabli docs, but this post gives you a faster path from nothing to working code.

Before you start

You’ll need two things from Payabli before writing any code: your API key and an entrypoint value. If you don’t have these credentials set up, talk to your Payabli solutions engineer.

Install the SDK

You’ll need Node.js 20 or later and npm. If you’re not sure which version you have, run node --version to check. You can download the latest Node.js from nodejs.org. Start by creating a new project and installing the SDK:

Bash
mkdir my-payabli-app
cd my-payabli-app
npm init -y
npm pkg set type="module"
npm install @payabli/sdk-node

That’s it. The TypeScript SDK is now installed.

Make your first transaction

Instantiate the client with your API key and call moneyIn.getpaid. Never hardcode your API key directly in source code, load it from an environment variable instead:

TypeScript
import { PayabliClient } from "@payabli/sdk-node";

const client = new PayabliClient({ apiKey: process.env.PAYABLI_KEY! });

A .env file with PAYABLI_KEY=your-key-here and a package like dotenv is the typical setup for local development. In production, inject it via your hosting platform’s secret management tooling. The webhook example app later in this post uses the same pattern.

With the client initialized, make a test transaction:

TypeScript
import { PayabliClient } from "@payabli/sdk-node";

const client = new PayabliClient({ apiKey: "YOUR_API_KEY" });

const result = await client.moneyIn.getpaid({
    body: {
        customerData: { customerId: 4440 },
        entryPoint: "your-entrypoint",
        paymentDetails: { serviceFee: 0, totalAmount: 100 },
        paymentMethod: {
            cardcvv: "999",
            cardexp: "02/27",
            cardHolder: "John Cassian",
            cardnumber: "4111111111111111",
            cardzip: "12345",
            initiator: "payor",
            method: "card",
        },
    },
});

console.log(result);

Run it with npx tsx index.ts.

Sandbox and production environments

Payabli has two environments: sandbox for testing and production for live payments. The sandbox environment lets you make test transactions, simulate boarding, and experiment with webhooks without touching real money. When you’re ready to go live, you switch to production. You pass the environment explicitly when you instantiate the client using PayabliEnvironment:

TypeScript
import { PayabliClient, PayabliEnvironment } from "@payabli/sdk-node";

const client = new PayabliClient({
    apiKey: "YOUR_API_KEY",
    environment: PayabliEnvironment.Sandbox,
});

Your API key is tied to a specific environment, so make sure the key you’re using matches the environment you’re targeting. See Environments in the docs for more detail.

One thing to know before you go live: the example above passes raw card data directly to the API. That works in the sandbox environment and is fine for testing, but in production, you’ll want to use a stored methodReferenceId instead. See Tokenization overview in the docs to learn how to use stored payment methods.

TypeScript SDK features worth knowing

Before moving on to webhooks, a couple of things about the SDK are worth pointing out:

Built-in retries

The SDK automatically retries failed requests on 408, 429, and 5xx responses with exponential backoff. The default retry limit is 2. You can override this per-request:

TypeScript
await client.moneyIn.getpaid(..., { maxRetries: 0 });

Typed errors

When the API returns a non-success status code, the SDK throws a PayabliError. Catching it gives you structured access to the status code and response body:

TypeScript
import { PayabliError } from "@payabli/sdk-node";

try {
    await client.moneyIn.getpaid(...);
} catch (err) {
    if (err instanceof PayabliError) {
        console.log(err.statusCode);
        console.log(err.body);
    }
}

Typed request interfaces

The SDK exports every request and response type under the Payabli namespace, so you can construct payloads with full type safety before passing them to the client. This is useful when you’re building up a request object across multiple steps, or when you want your editor to catch shape errors early:

TypeScript
import { PayabliClient, Payabli } from "@payabli/sdk-node";

const payment: Payabli.RequestPayment = {
    body: {
        customerData: { customerId: 4440 },
        entryPoint: "your-entrypoint",
        paymentDetails: { serviceFee: 0, totalAmount: 100 },
        paymentMethod: {
            cardHolder: "John Cassian",
            cardnumber: "4111111111111111",
            cardexp: "02/27",
            cardcvv: "999",
            cardzip: "12345",
            initiator: "payor",
            method: "card",
        },
    },
};

const result = await client.moneyIn.getpaid(payment);

Tree-shakeable subpackage imports

If bundle size matters, you can import individual subpackage clients instead of the top-level PayabliClient:

TypeScript
import { MoneyInClient } from "@payabli/sdk-node/money-in";

This lets bundlers include only the code your app actually uses.

Set up webhooks

Once payments are flowing, you’ll want to know about them in real time. Payabli’s webhook system sends HTTP POST requests to your server whenever payment events occur.

The fastest way to get webhooks working with the TypeScript SDK is the webhook example app. Clone the examples repo and navigate to the TypeScript webhook app:

Bash
git clone https://github.com/payabli/examples.git
cd examples/webhooks/ts-sdk

Copy the environment template and fill in your credentials:

Bash
cp .env.example .env

You’ll need to set PAYABLI_KEY, PAYABLI_ENTRY, and OWNER_ID in the .env file. The OWNER_ID is the same as your organization’s ID in Payabli.

Install the dependencies and start the app:

Bash
npm install
npm start

The app starts a local server on port 3000. To receive webhooks, that server needs to be reachable from the internet, so you need to tunnel it. The easiest option is localhost.run, which requires no account. It does require SSH, the Secure Shell program that handles encrypted connections between machines. SSH comes pre-installed on macOS and most Linux systems. On Windows, it’s available through the built-in OpenSSH client (included since Windows 10).

Run this in a new terminal window while your app is running:

Bash
ssh -R 80:localhost:3000 nokey@localhost.run

You’ll get a public HTTPS URL. Paste it into the original terminal window when the app prompts you.

If you’d prefer more visibility into webhook traffic (request inspection, replay, and so on), ngrok is a popular alternative that requires a free account and a small install step. The Webhook quickstart in the Payabli docs covers both tools in detail.

From there, the app does the rest: it registers an ApprovedPayment notification with Payabli pointing to your tunnel URL, then waits for you to press Enter. Hit Enter, and the app fires a test $1.00 transaction and prints the incoming webhook payload to your terminal.

That’s the full loop: a transaction goes through, Payabli fires a webhook, and your server receives it.

See the Webhook quickstart in the Payabli docs for more details, including how to build a webhook server from scratch and how to register notifications for other event types beyond ApprovedPayment.

Keep going

Here’s a quick map of where to go next, depending on what you’re working on:

If you want to…Go here
Understand the Payabli platform as a developerGetting started for developers
See every available SDK methodSDK reference on GitHub
Work through a full example app (customers, temp tokens)TypeScript SDK guide
Build a production-safe payment flow with stored methodsTokenization overview
Register webhooks for other event typesWebhook quickstart

Your Payabli solutions engineer is also a resource if you get stuck or need help scoping your integration.


Learn about our developer tools and server SDKs in the Payabli Docs.

How to Give AI Coding Assistants Real Payabli Context

By Casey Smith, Payabli Docs

Key Takeaways:

  • AI coding assistants can hallucinate payment API endpoints when they lack grounded context; Payabli offers several tools (MCP server, markdown docs, llms.txt indexes, OpenAPI spec, server SDKs) to fix that.
  • The MCP server takes about 30 seconds to set up in Cursor or other third-party tools and covers most integration questions.
  • Section-level llms.txt endpoints let you load targeted context without burning your entire context window.
  • Project instructions files (CLAUDE.md, AGENTS.md) give your assistant a persistent context across every conversation. 

If you’re using Cursor, Claude Code, Windsurf, or another AI coding assistant to build your Payabli integration, you’ve probably run into this: you ask your assistant how to make a transaction, and it generates plausible-looking code that calls endpoints that don’t exist, or uses parameter names it invented. This isn’t a sign that your assistant is bad at code, it’s just a sign that it doesn’t have a real, grounded context about Payabli’s APIs.

This post is about fixing that. We have multiple tools for you to give your AI assistant accurate, up-to-date Payabli context: an MCP server, per-page markdown, server SDKs, section-level LLM indexes, and a full OpenAPI spec. Here’s when to use each one.


How to set up the Payabli MCP server

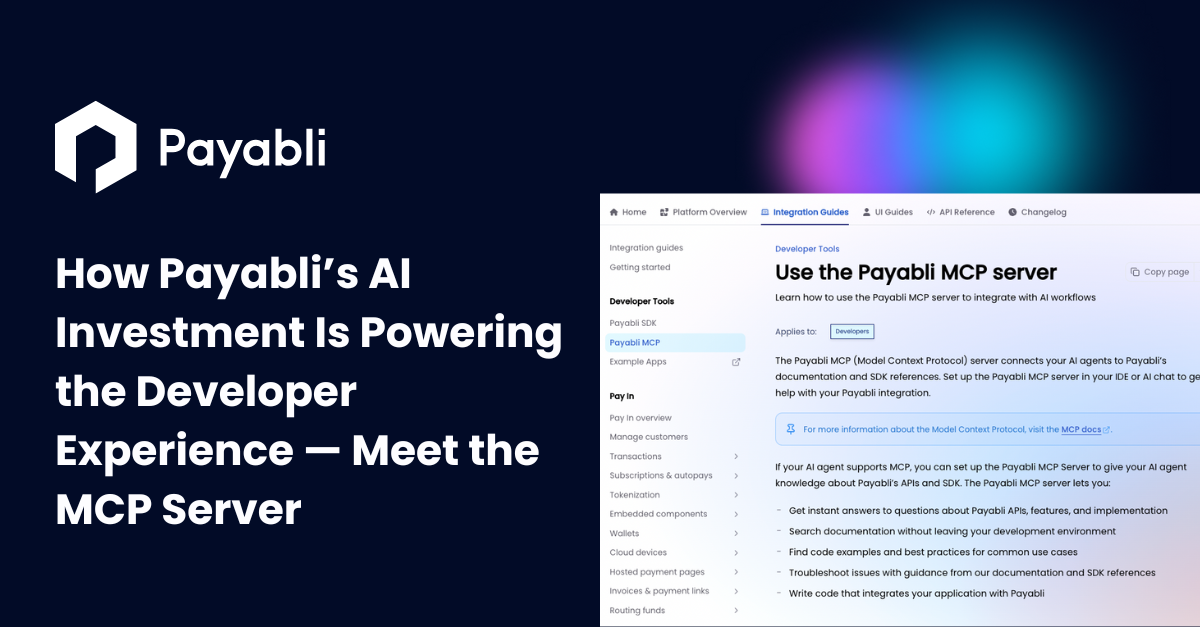
MCP (Model Context Protocol) is a standard that lets your AI tools query external knowledge sources directly from your IDE. Instead of searching on your own and then copying and pasting docs into the chat, your assistant can search them on demand.

The Payabli MCP server gives your assistant two tools:

  • search-payabli-docs: searches official Payabli documentation
  • ask-question-about-payabli: searches the SDK repos and other resources

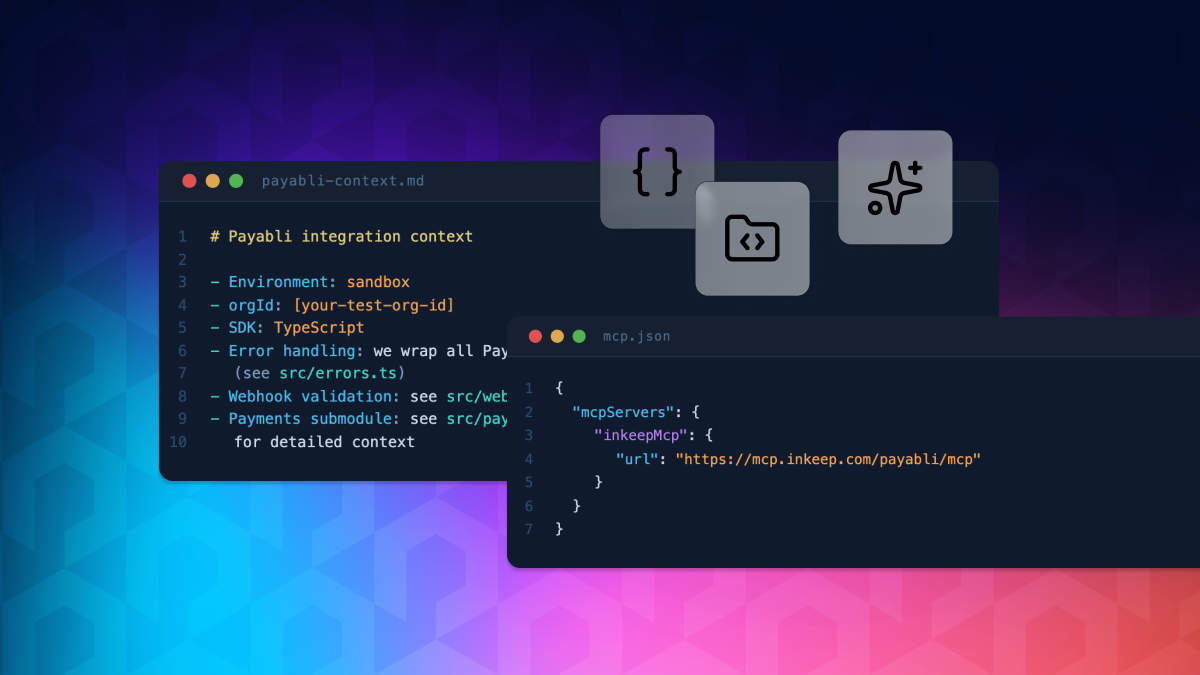
Setting up in Cursor takes about 30 seconds. Create or open .cursor/mcp.json in your project root and add:

JSON
{
 "mcpServers": {
   "inkeepMcp": {
   "url": "https://mcp.inkeep.com/payabli/mcp"
   }
 }
}

Restart Cursor and you’re done. For Windsurf and Claude, see the full setup guide. It’s the same idea, just different config file locations.

Once it’s running, you can ask your assistant things like “how do I make a sale transaction” or “what does the boarding flow look like” and it will search the docs rather than guess.


How to load a Payabli docs page into your AI assistant 

Sometimes you want to point your assistant at one specific doc page (the webhook reference, the API overview, a particular guide) without loading everything. Append .md to any URL on docs.payabli.com to get a clean markdown version with no navigation or JavaScript overhead:

Full page: https://docs.payabli.com/guides/pay-in/transactions
Markdown only: https://docs.payabli.com/guides/pay-in/transactions.md

You can paste that markdown URL directly into your assistant’s context, or use it with a fetch tool if your IDE supports that. It works on every page across the site.

As we author our documentation, we tag content that doesn’t translate well into an AI context like React-based decision trees, complicated SVG diagrams, visual and interactive elements optimized for human readers. This tagging excludes the content from the markdown versions. We also add plain-text equivalents for anything important that would otherwise be lost. The result is that markdown versions use less of your context window and contain content that’s actually meant for an AI to read.


Which Payabli llms.txt file should you use? 

When you need your assistant to understand the Payabli landscape (general concepts, integration workflows, which API endpoints exist, and other resources), use LLM-optimized indexes at the site level and per section. The site-wide llms.txt (~112 KB) is a structured directory of every page with brief descriptions, useful for giving your assistant a map of what exists.

If you want to load actual content at the site level, llms-full.txt has everything in one file, though at ~7.5 MB it’s heavy and will eat a significant chunk of your context window.For actual content, the section-level endpoints are usually the right call. They’re smaller and more targeted:

What you’re working onEndpoint
API reference/developers/api-reference/llms-full.txt (~40 KB index)
Developer tools + SDKs/developers/llms-full.txt (~5.3 MB, or ~2.2 MB without the spec)
Guides only/guides/llms-full.txt
Cookbooks/cookbooks/llms-full.txt (~27 KB)

If you’re only working in one language, the developer tools endpoints accept a lang query parameter so you’re not burning tokens on SDK examples in languages you don’t use:

https://docs.payabli.com/developers/llms-full.txt?lang=python

Which Payabli server SDK should you install for AI context? 

We publish official server SDKs in TypeScript/Node, Python, C#, Java, Go, Ruby, PHP, and Rust, all generated from the OpenAPI spec so they stay in sync with the API. Once the SDK is installed in your project, your AI assistant can read the types and method signatures directly from your dependencies. That’s usually enough to stop it from generating code that doesn’t match our API. See the server SDK overview to find your language.


How do you use the Payabli OpenAPI spec?

If you’re doing API-heavy work and want your assistant to have complete, authoritative knowledge of the Payabli API, drop in the full OpenAPI specification. At ~1.3 MB, it’s a YAML file covering every endpoint, request parameter, and response schema.

You can download it directly or reference it by URL in your project. Most AI coding tools can load it as a file or fetch it directly. It also works with API clients like Postman and Insomnia if you want to explore endpoints outside of your IDE.


How do you set up project instructions for AI coding tools? 

This one is worth spending a few minutes on. Most AI coding tools support a project-level instructions file that gets loaded automatically at the start of every conversation. The filename varies by tool (CLAUDE.md for Claude Code, AGENTS.md for Cursor and Codex, .github/copilot-instructions.md for Copilot), but the idea is the same: you write it once, and your assistant always knows the basics about your integration.

Your repo-level file doesn’t need to cover everything. A good pattern is to keep it high-level and point to more detailed instructions for specific parts of your codebase. For example, if you have a payments submodule with its own conventions, you can maintain a separate instructions file there and just reference it from the root:

Markdown
# Payabli integration context

- Environment: sandbox
- orgId: [your-test-org-id]
- SDK: TypeScript
- Error handling: we wrap all Payabli errors in our ApiError class (see src/errors.ts)
- Webhook validation: see src/webhooks/verify.ts
- Payments submodule: see src/payments/AGENTS.md for detailed context

One important caveat: don’t put secrets in this file. API tokens, credentials, and anything sensitive should stay in environment variables or a secrets manager. The instructions file is for context and conventions, not credentials, and it’ll likely end up committed to your repo.

Check your tool’s docs for the exact filename. The content is the same regardless.

Which AI context tool is right for your Payabli integration? 

Not sure where to start? Use this as a quick reference:

SituationWhat to use
Starting a new integrationMCP server + SDK
Need accurate method names and parametersSDK + OpenAPI spec
Need details on one specific page.md suffix
The assistant needs to understand the doc landscapellms.txt index
Loading content for a specific sectionSection-level llms-full.txt
Persistent project contextInstructions file in your repo

Start with the MCP server and the SDK for your language. That combination covers most questions your assistant will run into during a typical integration. Add the others as your work gets more specific: a particular guide page, a section-level index for heavy work that needs more context, a project instructions file once your team has patterns worth preserving.

We want Payabli to be the easiest payments company to integrate with, so we made these tools available because AI assistants work better with real context. The better the context, the better your AI agents understand Payabli, and the faster you can integrate.


Learn about our developer tools and agent resources in the Payabli Docs.

Stop Searching, Start Building: Payabli’s Enhanced Documentation Architecture

Written by: Casey Smith, Docs @ Payabli

Finding the right doc shouldnโ€™t feel like a scavenger hunt. Thatโ€™s why we launched some big changes to how Payabli’s docs are organized. We completely reimagined the navigation and content organization to make it easier for our readers to find what they need and get on with their day.

Hereโ€™s whatโ€™s changing, why it matters, and whatโ€™s coming next.

Whatโ€™s changed

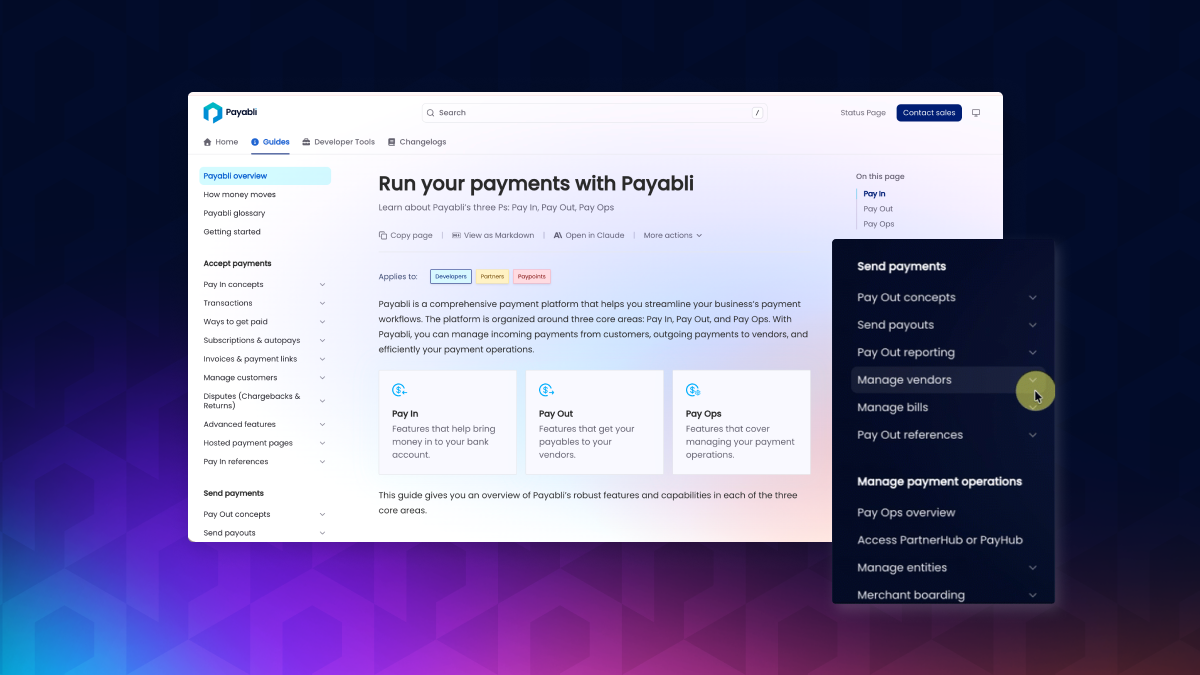
Navigation that matches how you actually work

Before: Four separate sections (Home, Learning, Developers, Product docs) that forced you to guess where content lived. API guides in one place, UI guides somewhere else, concepts scattered across a โ€œLearningโ€ section you probably didn’t know we had.

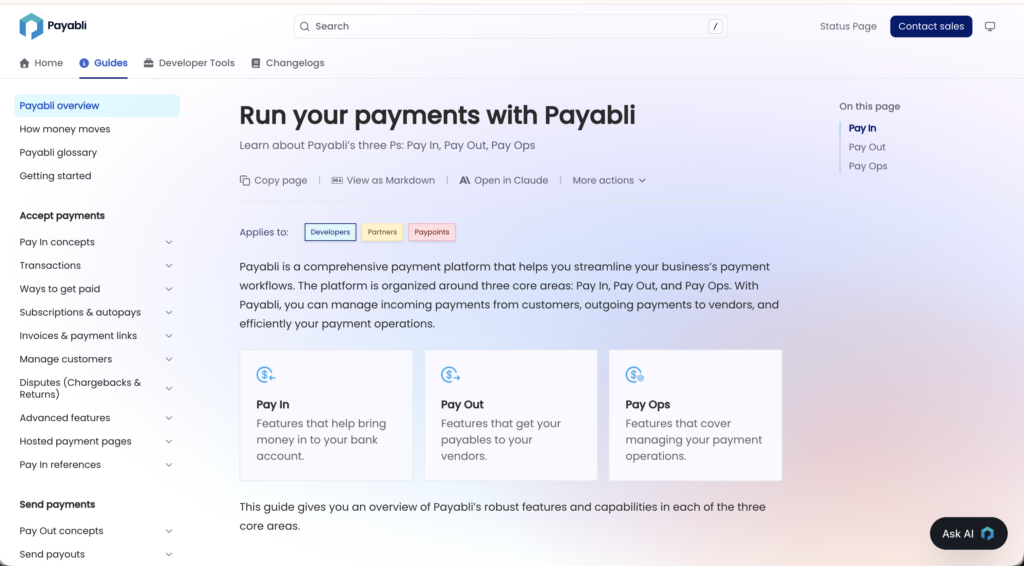
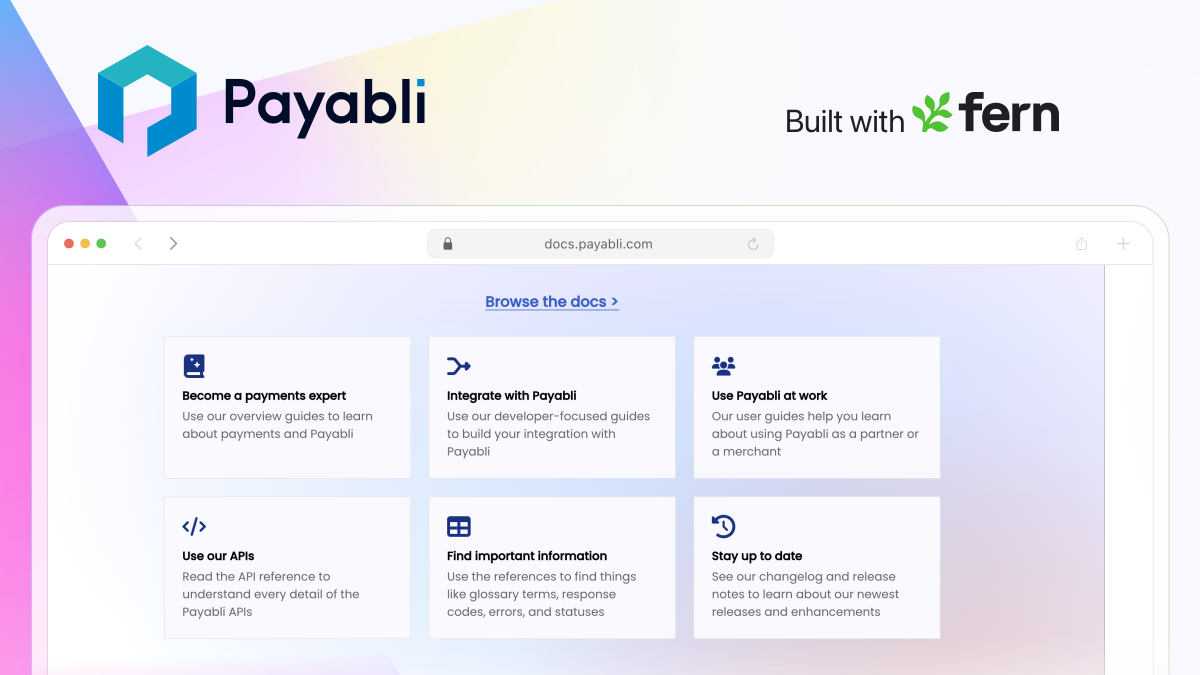
Now: Three clean tabs organized by what youโ€™re trying to do:

Changelogs: Version history and updates

Guides: Concepts, procedures, and troubleshooting for everyone

Developer Tools: API reference, SDKs, and testing resources

No more hunting across multiple sections. No more โ€œis this in Developer docs or UI docs, or is it Learning?โ€

Shallower navigation, less hunting

We flattened the navigation hierarchy. Some things that took 5-6 clicks now take 2-3. Others went from 5 to 3. But the real difference is you’re not jumping all over the screen anymore.

For example, getting to the V2 Transaction Endpoints used to look like this:

Product tab (top nav) โ†’ Developers โ†’ API Reference โ†’ 

scroll down โ†’ Pay In Endpoints โ†’ V2 Transaction Endpoints

Now itโ€™s:
Developer Tools โ†’ Pay In Endpoints โ†’ V2 Transaction Endpoints

Three clicks instead of five, and theyโ€™re all in the same navigation area. Less clicking, less hunting, less confusion.

Old way: